HOME           /           ABOUT           /           ETSY           /           CONTACT
Showing posts with label christmas. Show all posts

Wednesday, December 24, 2014

Gingerbread Cookies

Note: I recently asked bloggers to share some of their favorite Christmas cookie recipes, along with memories of making them, with the hopes it could be an online version of a Christmas cookie exchange party.

Today's recipe is from yours truly, with a holiday classic: Gingerbread cookies!

GingerbreadCookiesCloseup@Tree

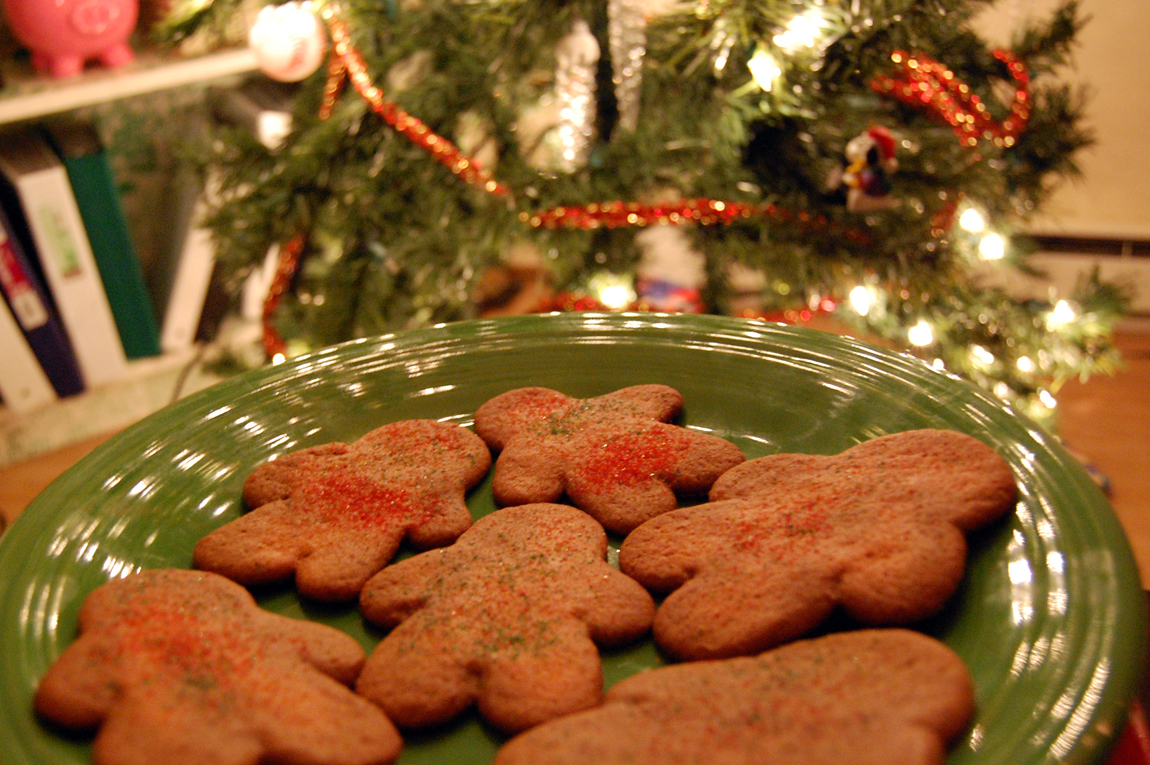
If there's a kind of cookie out there that's synonymous with Christmastime, it has to be gingerbread.

As a kid, I always loved getting the gingerbread house kits sold at stores, complete with the thick, rectangular pieces, generic gumdrops in plastic baggies, and the glue-like icing to hold it together. Somehow I would always have selective amnesia after Christmas, thinking the gingerbread house was going to taste awesome after sitting out and getting stale for weeks.

This same thing happened a couple years ago, when childhood reminisce got the best of me and I couldn't resist buying a kit. I had been duped with stale, cardboard tasting gingerbread. AGAIN.

To combat these gingerbread atrocities, or just the fact that I wanted to make gingerbread myself, I made this kind of cookie from scratch for the first time last year. The process is about the same with cutout sugar cookies; the dough is best to work with when refrigerated overnight. It's a detail I almost always forget.

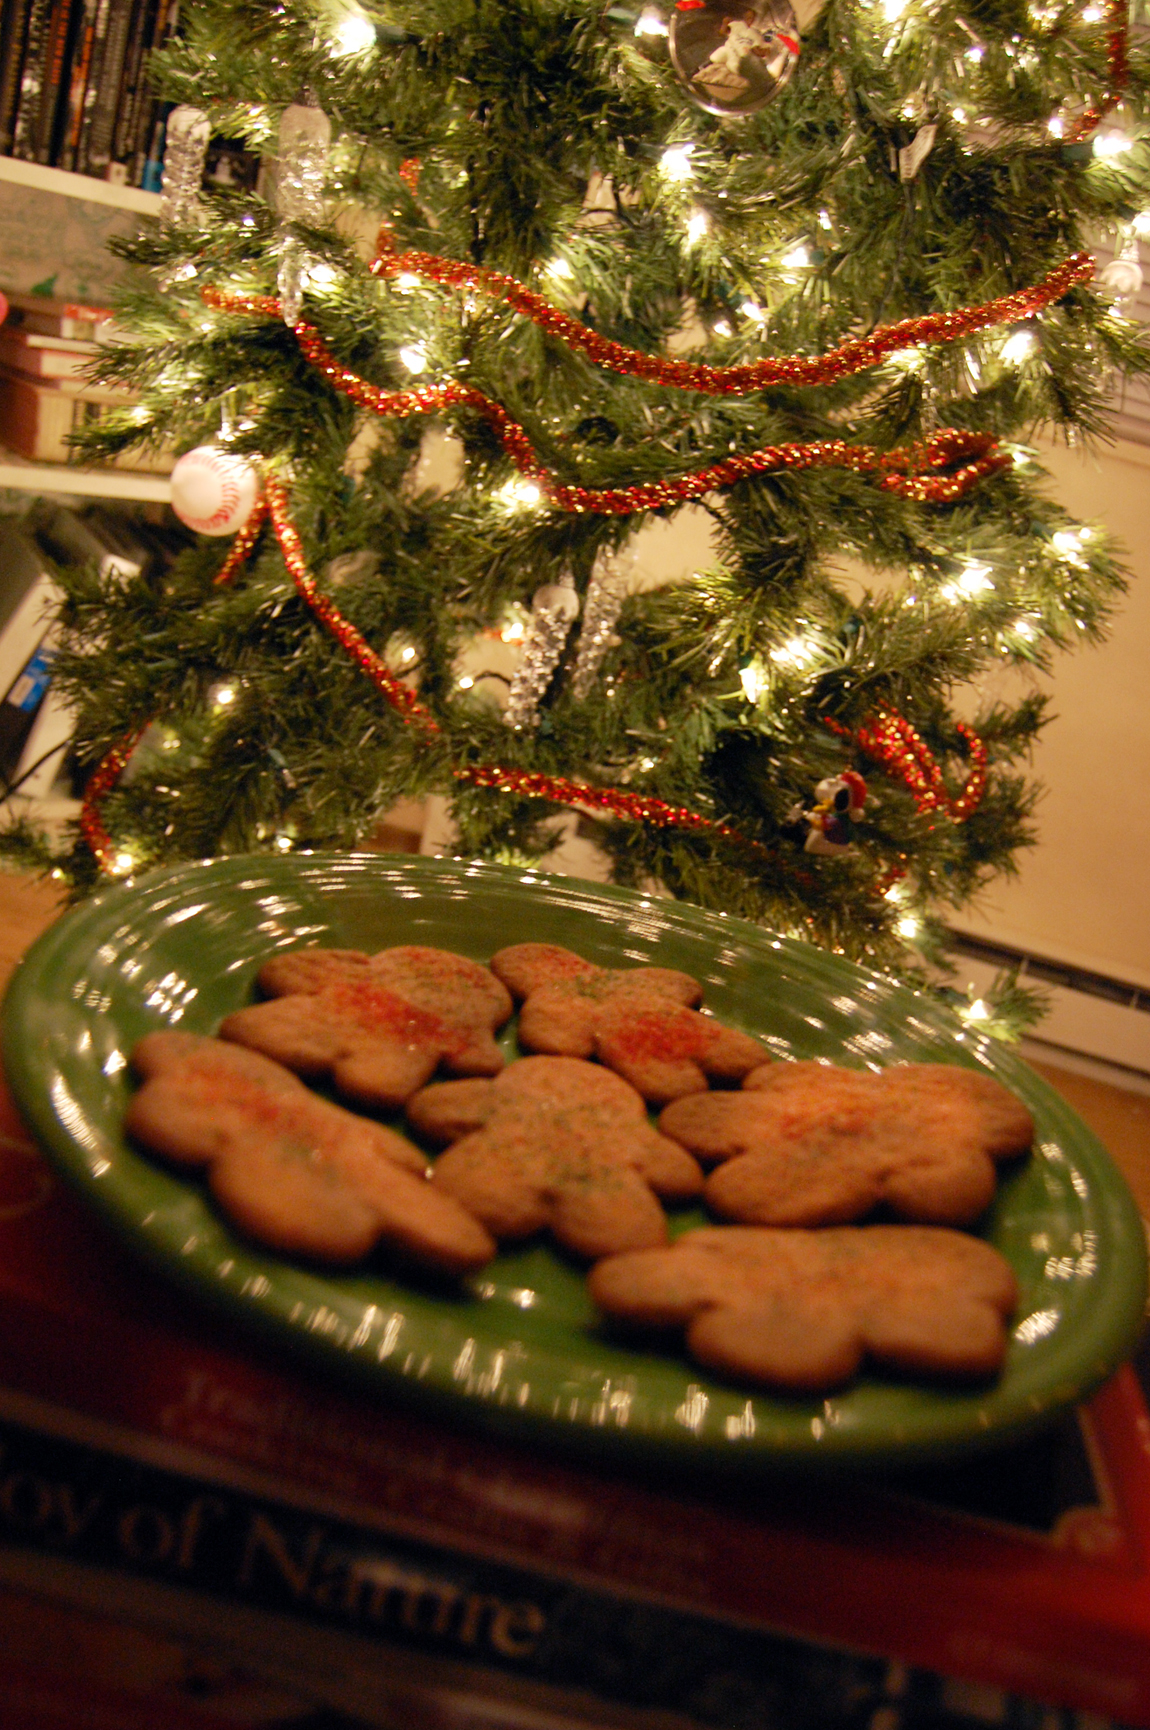
Anyway, I made this particular batch of cookies last week to bring to a little work Christmas potluck, and they were the first thing to go.

Mark also contends it's the best gingerbread he's had, with the perfect balance tang and sweetness. That means a lot, considering he's the biggest food snob I know. (I love him dearly, but his mom spoiled him with confections growing up. She had her own baking business at one point.)

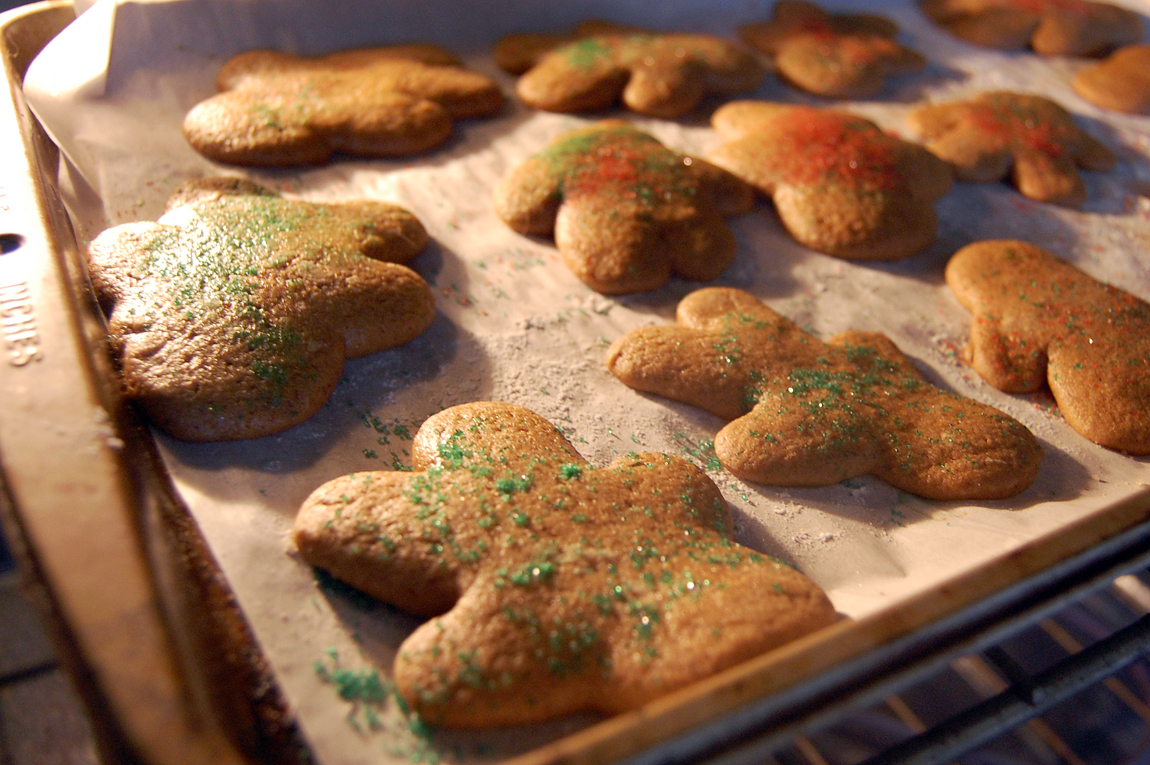
Besides molasses being pretty hard to come by in the store this time of year, this recipe was pretty easy. I might also lighten up on the baking powder, since my men puffed out a bit more than expected.

But I think that smelling these through the house and tasting them is something I would like to do each year. If I were to make only only holiday cookie each year (though doubtful), I think this one would be it. Anyway, enjoy!

GingerbreadCookiesBaking

GingerbreadCookies@Tree

Gingerbread Cookies
Recipe via The Taste of Home

Yields about 18 cookies

Ingredients:

• 2/3 cup shortening
• 1 cup sugar
• 1 egg
• 1/4 cup molasses
• 2 cups all-purpose flour
• 1 teaspoon baking soda
• 1 teaspoon salt
• 1 teaspoon each ground cinnamon, cloves and ginger
• red and green sugar (optional)

Directions:

In a large bowl, cream shortening and sugar until light and fluffy. Beat in egg and molasses. Combine flour, baking soda, salt and spices; gradually add to the creamed mixture and mix well. Refrigerate for 2 hours or overnight.

On a lightly floured surface, roll dough to about a quarter inch thickness. Cut with a floured cookie cutter into desired shapes. Place two inches apart on baking sheets. (I swear by parchment paper!)

Bake at 350 degrees for 8 to 10 minutes or until edges begin to brown. Remove from pans to cool on wire racks.

This recipe also list a buttercream frosting to use, but I think the cookies taste great as is. Personally, I doubled the recipe so we'd have these cookies for awhile. I also have a preference for these with a softness in the middle, rather than a crunch, so I don't leave them in as long.

Tuesday, December 23, 2014

Laura's Saltine Toffee

Note from Kate: I recently asked bloggers to share some of their favorite Christmas cookie recipes, along with memories of making them, with the hopes it could be an online version of a Christmas cookie exchange party. Today's recipe comes from Laura, of The Pittsburgh Kitchen, who is actually my real-life friend!

I've gotten some great cooking ideas and tips from her over the last few years, and this saltine toffee she made sounds like the most satisfying salty-sweet combo. Enjoy!

cookieandtea@laura

crackers@laura

Recently, I've suffered through a series of baking fails. Not just once but two or three times I've unsuccessfully creamed butter and sugar - this is something I've done without problems many many times, but apparently I'm off my game. Then the other night my friend Sarah came over and I wanted to make these cookies, which call for vanilla pudding mix. I texted Sarah to bring some, but I didn't add any explanation so, not surprisingly, Sarah very kindly brought actual, prepared pudding packs. Just so you know, you cannot substitute prepared pudding for pudding mix. Not good.

You might notice that Saltine Toffee is not actually a cookie and is in fact only barely a baked good at all. Perfect for the inexperienced or formerly-acceptable-but-currently-terrible baker! So I'll be bringing these to Christmas this year, and everyone is going to love them because they are extremely delicious.

noms@laura

breakit@laura

Saltine Toffee

Ingredients:
• 2 sticks (1 cup) butter
• 1 cup brown sugar
• 1 1/2 sleeves Saltines, maybe about 50 crackers
• 2 cups chocolate chips (all chocolate or mixed with white, butterscotch or peanut butter)
• 1 cup crushed pecans, toasted (or crushed heath bars, Oreos, maybe pretzels?)
• a couple pinches of sea salt, optional

Directions:

Preheat the oven to 350 degrees. Cover a baking sheet with aluminum foil and coat it with cooking spray (or just thinly spread some vegetable oil around with a paper towel like I usually do rather than ever buy cooking spray). Arrange the Saltines tightly on the baking sheet, fitting in as many as you can.

Melt the butter in a saucepan. Once it's completely melted, add the brown sugar and stir occasionally until the sugar is dissolved and the mixture is bubbly and a little thickened. Pour the mixture over the Saltines and bake it in the oven for 8 minutes.

Take the baking sheet out and scatter the chocolate chips over the toffee-covered crackers. Put it back in the over for another 2 minutes. When you take them out, spread the chocolate out with a butter knife or thin spatula. Sprinkle the nuts on top, sprinkle with some sea salt if you want, and let cool until set. Then break it up into pieces and eat!

Thanks, Laura!

Below, you'll see her adorable dog Twilly, who is pretty much the face of The Pittsburgh Kitchen. And below that is a picture of Laura and I at my wedding last year. :)

twilly@laura

weddingkate&laura

Monday, December 22, 2014

Femme Frugality's Peanut Butter Blossoms

Note from Kate: I recently asked bloggers to share some of their favorite Christmas cookie recipes, along with memories of making them, with the hopes it could be an online version of a Christmas cookie exchange party. Today's recipe comes from fellow Pittsburgh blogger Femme Frugality.

She's making peanut butter blossoms, which were a staple at my house growing up, too. My mom just made a fresh batch over the weekend. Enjoy!

peanut butter blossoms

When Kate asked me to participate in her Christmas cookie series, I was so excited. Who doesn't like cookies? Who doesn't like holiday memories?

There's only one little problem. I stink at making cookies. I'm pretty confident in my cooking abilities. And I can bake a pie like nobody's business. But for some reason cookies are not my forte.

My mother, on the other hand, is a fabulous baker. We'd always have baked goods overflowing when I was a kid as she tried new recipes. Extras would go to church with us, get sent into work with my dad, or be delivered to the neighbors. But those recipes that she was trying? None of them were handed down from generation to generation. While she always baked from scratch, her recipes often came from the back of a box.

For the series, I decided to make my favorites. Peanut Butter blossoms made with Hershey's kisses. There's no secret recipe. It's on the back of the bag. When I went to make them, I noticed the bag was half empty. I almost went postal on my husband, who admitted to scarfing them down, but then I remembered it's Christmastime and we're supposed to be making happy memories. So I halved the recipe. I measured out 1/6 c sugar and tried to figure out how the heck to only mix in half an egg.

When all was said and done, the cookies turned out pretty great. My oldest only ate the chocolate kisses off. And my husband, who had previously eaten half the bag, preferred the cookie itself to its chocolate ensemble. The rest of us enjoyed them whole with smiles on all of our faces.

I think it's the quirky things that make our holiday memories memorable. Special. Worth repeating. Maybe next year the husband can "secretly" inhale half the bag again. My oldest will happily smear warm chocolate across their face and throw the peanut butter goodness on the floor. Why not? I've already mastered the art of splitting an egg in half.

Without further ado, here is our super secret Peanut Butter Blossom recipe, brought to you by warm, quirky memories and, of course, the back of the bag:

Peanut Butter Blossoms

Ingredients:

  • 1/2 c shortening
  • 3/4 c creamy peanut butter
  • 1/3 c granulated sugar
  • 1/3 c brown sugar
  • 1 egg
  • 2 T milk
  • 1 t vanilla extract
  • 1 1/2 c all-purpose flour
  • 1 t baking soda
  • 1/2 t salt
  • Additional granulated sugar
  • Directions:

  • Heat oven to 375 degrees Fahrenheit. Remove wrappers from chocolate.
  • Beat shortening and peanut butter in a large bowl until well blended.
  • Add 1/3 c granulated sugar and brown sugar. Beat until fluffy.
  • Add egg, milk, and vanilla. Beat well.
  • In a separate bowl, stir together flour, salt and baking soda. Then gradually beat it into your peanut butter mix.
  • Shape the dough into 1 inch balls. Roll those balls in the "additional granulated sugar" until they're fully covered. Place on an ungreased cookie sheet
  • Bake for 8 to 10 minutes, or until lightly browned.
  • Remove from oven, and immediately press one Hershey's kiss in the center of each cookie.
  • Carefully remove from the cookie sheet and onto a cooling rack. This helps make sure the kisses don't just melt everywhere. Cool completely, then enjoy!
  •  

    Sunday, December 21, 2014

    DIY Christmastime Pennants
    made with paint samples

    This is the perfect craft for doing something that's relatively easy while feeling like a badass.

    roomfullapennants

    christmaspennantscloseup

    Let me explain: Paint samples at stores are typically free, since the intent is to get an idea of what color you'd like to paint a room. But taking 30 or 40 of them looks kinda weird. Oh well.

    Anyway, I initially made pennants from paint samples for my wedding, believe it or not. They were hung up by the bar. Afterwards I repurposed them as living room decorations, where they hung for nearly a year.

    But those pennants were variations of orange, and didn't quite fit in with the Christmastime color scheme, so I decided to make more festive ones. Just keep in mind that this craft isn't limited to Christmas, but can be for any occasion with any color palette.

    DIY Pennants, made with paint samples
    Makes two sets of eight pennant strands.

    What you need:
    • 32 paint samples, preferably 16 pairs, in colors of your choosing (if you're anything like me, grab a few extras in case of mess ups)
    • rubber cement or other adhesive
    • scissors
    • string
    • hole punch

    Directions:
    First, since paint samples aren't two-sided, is to glue pairs of paint samples together. I matched up colors, but you can do it however you like. Set aside to dry. Next, cut paint samples into triangles. I used an extra paint sample to make a stencil for the rest. Then punch holes into the corners and string together. Voila! Some classy looking decor that barely cost anything to make!

    whatyouneed

    pennantmakinghijackedbykitty

    Waldo wanted to help, too. :)

    Do you have any favorite holiday decor?