HOME           /           ABOUT           /           ETSY           /           CONTACT
Showing posts with label DIY. Show all posts

Sunday, December 21, 2014

DIY Christmastime Pennants
made with paint samples

This is the perfect craft for doing something that's relatively easy while feeling like a badass.

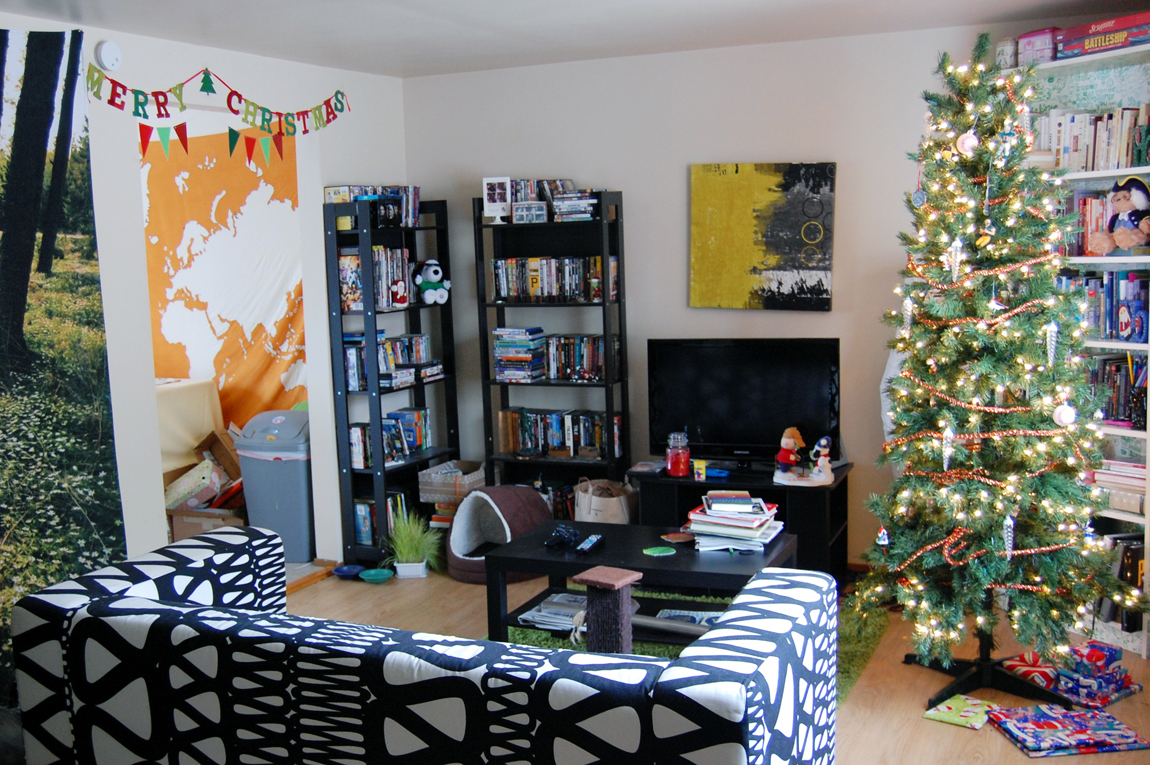
roomfullapennants

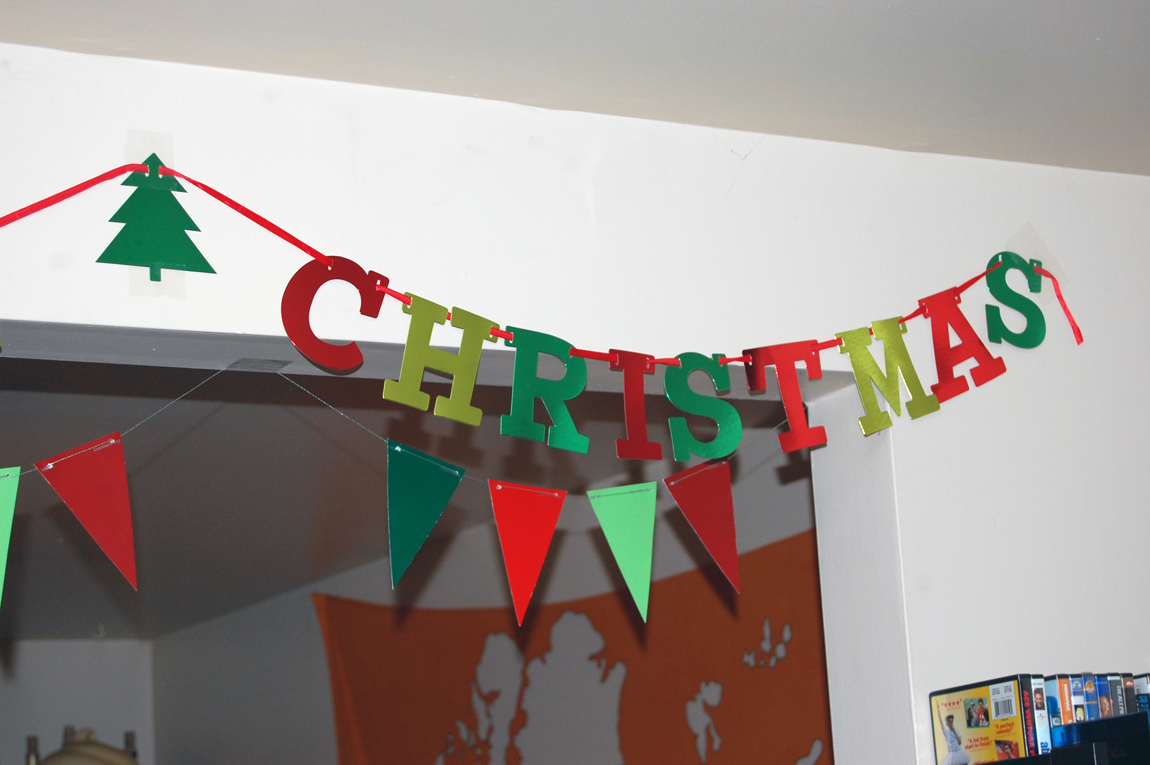
christmaspennantscloseup

Let me explain: Paint samples at stores are typically free, since the intent is to get an idea of what color you'd like to paint a room. But taking 30 or 40 of them looks kinda weird. Oh well.

Anyway, I initially made pennants from paint samples for my wedding, believe it or not. They were hung up by the bar. Afterwards I repurposed them as living room decorations, where they hung for nearly a year.

But those pennants were variations of orange, and didn't quite fit in with the Christmastime color scheme, so I decided to make more festive ones. Just keep in mind that this craft isn't limited to Christmas, but can be for any occasion with any color palette.

DIY Pennants, made with paint samples
Makes two sets of eight pennant strands.

What you need:
• 32 paint samples, preferably 16 pairs, in colors of your choosing (if you're anything like me, grab a few extras in case of mess ups)
• rubber cement or other adhesive
• scissors
• string
• hole punch

Directions:
First, since paint samples aren't two-sided, is to glue pairs of paint samples together. I matched up colors, but you can do it however you like. Set aside to dry. Next, cut paint samples into triangles. I used an extra paint sample to make a stencil for the rest. Then punch holes into the corners and string together. Voila! Some classy looking decor that barely cost anything to make!
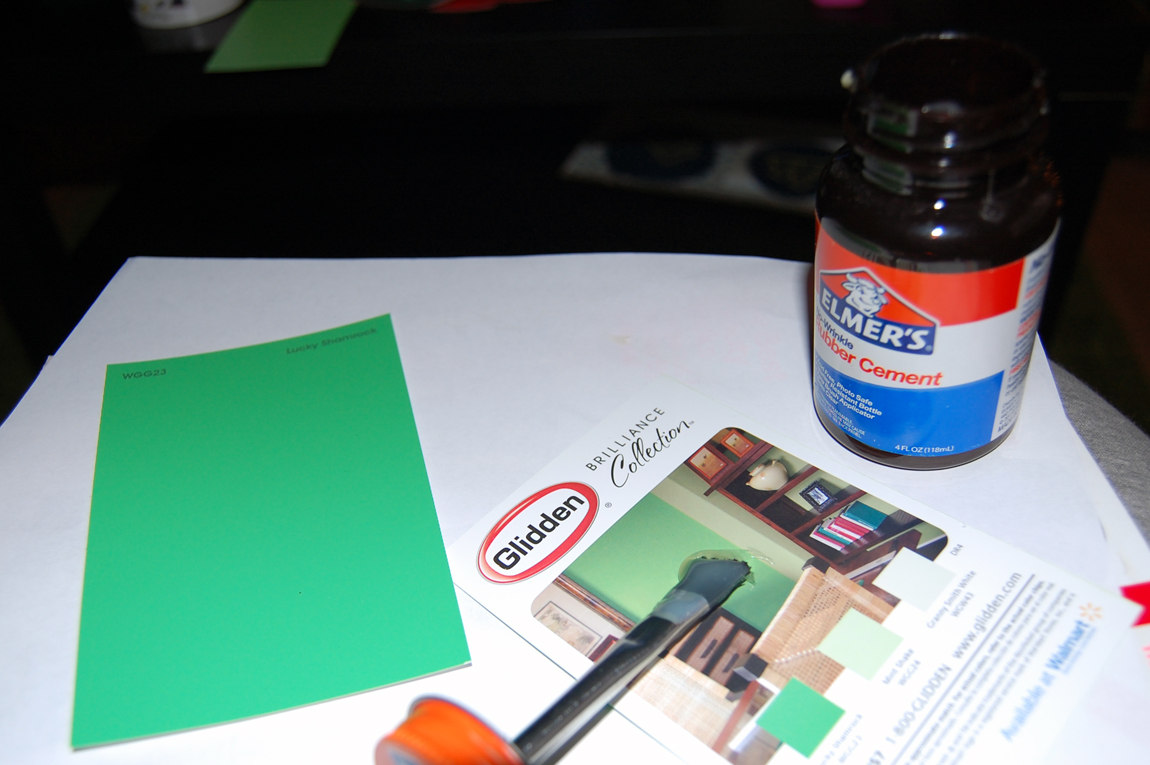
whatyouneed

pennantmakinghijackedbykitty

Waldo wanted to help, too. :)

Do you have any favorite holiday decor?

Wednesday, October 22, 2014

Best of: Photo Booth

WeAreAwesome@PhotoBooth

Lauren&Chris@PhotoBoothMary&Aaron@PhotoBooth

AshleyAlexKate@PhotoBooth

Me&Dad@PhotoBoothMom&Dad@PhotoBooth

Lauren&Kyle@PhotoBooth

Grupo1@PhotoBoothGrupo2@PhotoBooth

It was so difficult to choose my favorite photo booth photos. All of them were so great. Well, it was easy to cut a few, since they provided proof of some of the debauchery that night. Ha.

While some companies provide photo booth services for hundreds, sometimes thousands of dollars, I was able to have a photo booth at my wedding for less than 100 bucks!

Thursday, October 16, 2014

DIY Wedding: RSVPs

Mike&Trey@MadLibs

Dave&Janet@MadLibs

Bud@MadLibs

Mark and I both loved playing Mad Libs growing up. I can't speak for him, but I always had to write "shave" or "poop" every time there was a fill-in-the-blank verb. "Turds" if there was a noun. It made for some silly, immature stories that didn't make much sense.

Anyway, when I saw the Mad Libs RSVP idea on Pinterest during one of my many wedding planning binge sessions, I knew immediately it was something we had to do.

I don't think this project requires much explanation. And unlike a lot of things on Pinterest, this was a very reasonable, doable project. We made the RSVP cards using Adobe InDesign, put four to a page, and had them printed at a local FedEx Store, where they also cut them for a nominal rate.

If I could do it again, I would either use thicker paper or add envelopes for the response cards. We used cardstock paper, which is thicker than printer paper, but something a little more durable would've been more effective. We printed the address on the back side of these cards and added postcard stamps to them. It saved same postage money, but a few of the RSVPs were pretty beat up by the time we got them. There were even one or two mailed that we never received.

My favorite part was getting these back in the mail, and wondering what the mailman thought reading them. It made me eager to run to the mailbox after work everyday. I've always loved getting mail, but this is probably one of the biggest examples of that because I was getting dozens of these responses over the course of a month.

And now, all of the responses are in a photo album we keep in our living room. I think it's better than a guestbook, because people could get creative and cute without having to try too hard or get really cheesy. There were a ton of innuendos and inside jokes. It was much appreciated. It was also nice because people who couldn't be there were still represented.

What I realize now is that maybe this project wasn't as older generation friendly. Family members participated, of course, but it was our high school and college friends that really went running with the Mad Libs idea. For instance, a lot of family members and family friends wrote "walk" down the aisle. Of course we were walking! Perhaps they didn't understand or didn't care to be more creative.

I'm still glad I did it, though.

See some of my favorite RSVPs here.

What are some of the most memorable wedding invitations you've received?

Wednesday, October 15, 2014

Best of: Wedding RSVPs

Colin&Renata@MadLibs

Max@MadLibs

JacksonStreet@MadLibs

Liz@MadLibs

Willy@MadLibs
* I edited last names out of some of these response cards for the sake of our friends' anonymity.

The best things in life may not be free, but they're often very cheap.

After a few hours of designing and editing, $10 in printing costs, and $20 in postage costs, voila! I made some creative and memorable RSVP cards for my wedding last year. They're rife with personality and inside jokes.

Come back tomorrow to read more about how and why I decided to create Mad Libs RSVP cards.

Friday, October 10, 2014

DIY Wedding: Escort Cards

The end of October marks my first wedding anniversary, and I'm commemorating it by sharing some of of the DIYs and projects I did leading up to the wedding. Hope you enjoy this week's project: Escort cards!

EscortCards

Ah, fall foliage is definitely the best part of the season, in my opinion. (Despite popular belief, pumpkin-flavored everything isn't.) The colors of the leaves are so rich, so beautiful. It's particularly beautiful in western Pennsylvania, where there are many lush trees and rolling hills.

I thought these cards brought something a little more unique than the typical card, and could potentially be used as a keepsake later. I became inspired when I saw escort cards that were actual leaves with a metallic calligraphy on each. I thought it was beautiful until I imagined a swift wind blowing through the room. So I decided to compromise.

The process to make them was fairly simple.

First, pick your leaves! My parents have a ton of trees in their backyard, so it's basically a gold mine for leaves. I tended to pick smaller, brighter ones.

Then, find a nice old, book you don't care about too much. Preferably hardback. Pat leaves dry, if they're wet, and place a leaf between every few pages. Then stack some heavy items on top of that book and wait! I would say wait three days to a week to get your best pressed leaves results. By the time they're done, they should be dry and flat, but not too brittle.

I used Adobe InDesign to write out names and table numbers, fitting eight names to a page. This also can be done on Word or any other text-based program, but was a little easier on InDesign because the text can be easily aligned and centered.

Once those names were printed on stock paper and cut, I glued each leaf to a card using rubber cement. I opted for the cement because I thought it would hold up better. And voila! Escort cards with flair.

Escort cards cost:

Cardstock, $10; leaves, FREE!

Total: Around $10

What kinds of projects have you used for pressed leaves?

Saturday, October 4, 2014

DIY Wedding: Save the Dates

Just a quick note: October marks my first wedding anniversary, and I'm commemorating it by sharing some of of the DIY's and projects I did leading up to the wedding. Hope you enjoy this week's project: Save the dates!

SaveTheDatesDIY1

Usually they're magnets, but it seems like no matter what, save the dates are always the same. So and so are getting married! There is a floral print, a script font, a pair of doves. But no. That simply didn't reflect my personality nor Mark's.

OK, so save the dates aren't that big of a deal. They're not even really a wedding requirement. But these little guys were definitely fun to make.

This project was a little bit of trial and error. A friend had screen printed save the dates, so I guess I got the idea from her. I got my friend Laura to sketch up some things, and we ended up picking the tree and a ketchup bottle. (For those of you who don't know, the Heinz plant originated in Pittsburgh. You can still read Pittsburgh on the label if you ever come across a bottle or a packet.)

And here's what a couple of the final projects looked like:

SaveTheDates4SaveTheDates5

SaveTheDates2

Laura potentially could've sketched up 50 of these, but instead, opted for another method: The almighty screen print!

I know screen print stations can be made at home, but since I've only screen printed things a handful of times, and I'm usually a pretty messy person as it is, I decided to go to a screen print shop to get them done.

Artists Image Resource, a Pittsburgh shop, has open evenings to use the studio and get some assistance. It's as simple as putting the image on a transparency, screening the image, and cutting to proper size, like so:

SaveTheDatesDIY2

SaveTheDatesDIY4

SaveTheDatesDIY3

SaveTheDatesDIY5

Yay! At this point, this is where the idea to use the watercolors came in. Mark and I had painstakingly chose a color to screen print with, a rust colored paint, but it didn't quite pop as expected. But we didn't fret. The guy who helped us screen print actually suggested the watercolors, so we went with that. It was a little time consuming, but in the end, every person got their own, unique card.

So once all of that was done, I addressed the back and sent them in the mail! Simple as that. :)

Save the date cost:

Cardstock, $10; Screen printing rental/assistance at AIR, around $30; Watercolors, $5; Postage, at 21 cents each x 60, $12.50;Help of friends, love.

Total: Around $60

Do you have a favorite save the date you've received from a friend or family member?

Thursday, October 2, 2014

Sneak Peek: Save the Dates

SaveTheDates2

With the help of a screen printer, some awesome friends, and plenty of water colors, Mark and I sent these out to our wedding guests as postcards last year.

Laura, a great friend who I met from AmeriCorps, sketched two designs we sent out. Each was unique because every watercolor was different. :) (Also, she just got a pretty awesome designation for her recipe blog!)

Find out tomorrow how we pulled off our save the dates!

Wednesday, August 20, 2014

High School Style

I missed my weekly throwback post for the first time last week, and this week's post is a day late. Not that you were keeping track. But this is worth the wait, I swear. Say hi to 17-year-old me:

NYCSkirt

NYCSkirt2

I was a particularly angst-y high school senior for a bunch of reasons. I dealt with my first break up, totaled my car, and had a major case of senioritis. Also: Note the hands on hips and the glare. And maybe, trying to finish translating Spanish 5 homework in the class before. ;)

But anyway, the highlight of this photo is the skirt I'm wearing. It was originally a t-shirt I bought at a souvenir shop in New York City. From the time I looked at it, I loved it, but wanted to make it into something else. Soon after I returned home from my band trip at the Big Apple, I sewed this little number, wore it to school, and got a crazy number of compliments. I remember someone even asking me if I was going to be studying fashion design in college. Never had I been so proud to own a sewing machine and use it!

Of course, current me would say, why did you wear it with a hoodie? Why did you make it such a weird length? Why the face? But that day I wore that skirt to school was very memorable to me, especially in a year with a lot of gray.

An old friend came over for a cookout the other night, and we ended up looking at a lot of old photos. I had thrifty style in high school, too, but in a much different way. I loved goofy t-shirts paired with jeans and chunky costume jewelry or cereal box watches. I wore Threadless t-shirts as if they were a uniform requirement. I kind of forgot how funky my style was, and how far I've come since then. Not that it was bad, but I think I've toned it down a bit, at least.

My favorite t-shirt back then was a kid's rec league softball shirt I found at a thrift store (of course), and the back of it read "pizza shack" above the number. It was a sad day when the screen print began to peel on that shirt.

How has your style evolved since high school?